I have been using Ktor, PostgreSQL, and Jetbrains Exposed for a backend in a hobby project. I was adding a new feature that required making changes to the database, so after a quick Google search found a Stackoverflow answer recommending using Flyway to manage the database migrations. I was looking for a more complete solution to this answer, so ended up creating a sample project to share my learnings in migrating a Postgres database with Flyway in a Ktor project.
Setup
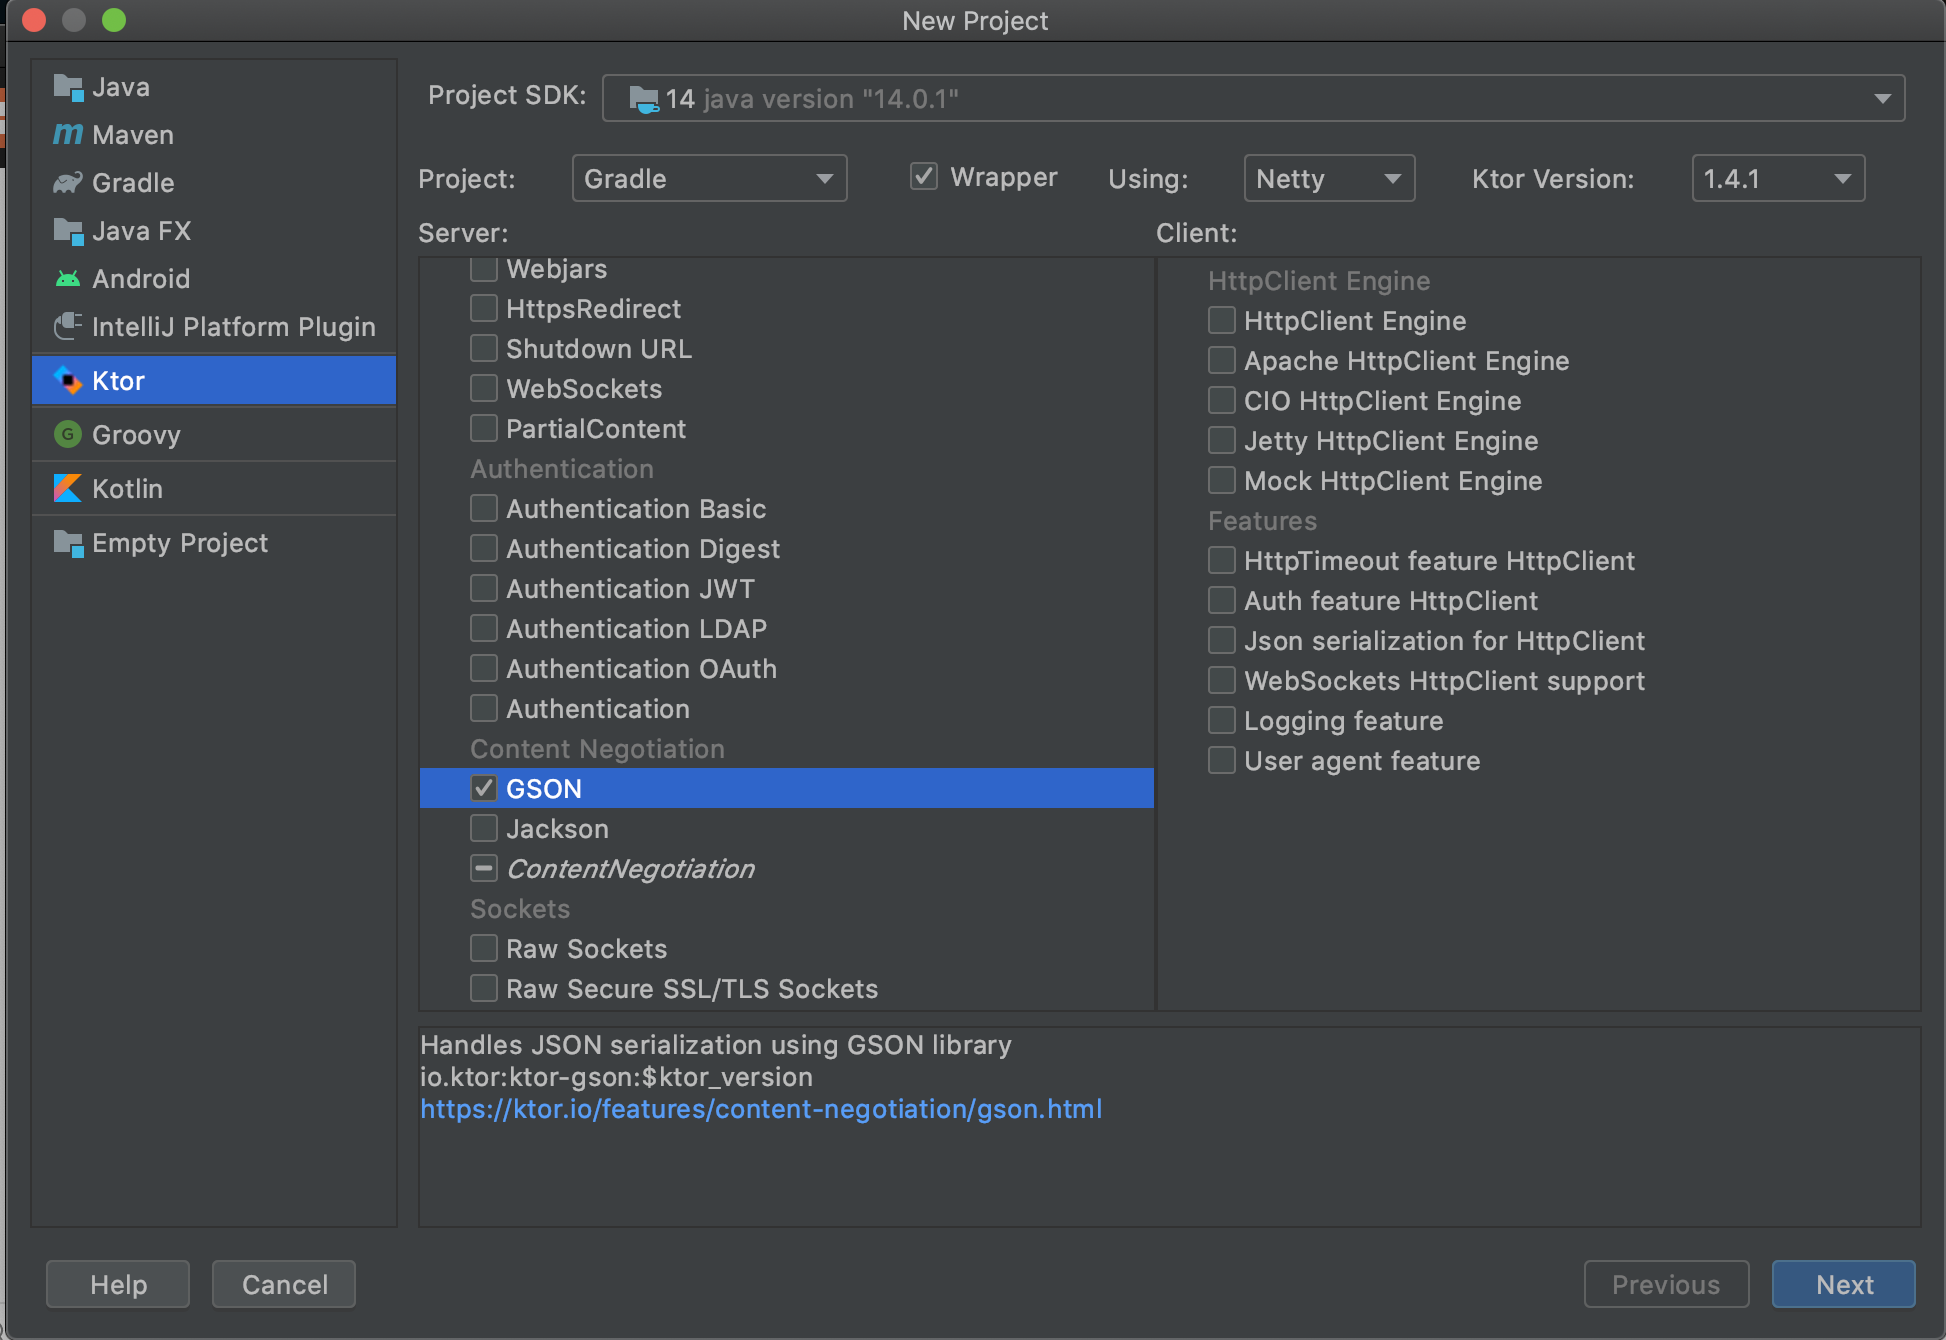
To start off this project I had used the Ktor project generator with minimal plugins to get a basic server up and running:
- Routing - define structured routes for a few endpoints
- Content negotiation - automatic content conversion according to the Content-Type and Accept headers
- Kotlinx serialization - JSON serialization
The project generator doesn’t use gradle version catalogs out of the box, so I had updated the project to make use of them to have all the versions managed in one place which can be found at libs.versions.toml file.
Initialize Database
Create Database Server
First, we must get a Postgres server running on our local machine. Since I am on a Mac, I use Postgres App to create a Postgres server on my machine as this provides a very simple GUI to get a Postgres database server running. Once the server is up, you will need the JDBC url which will look something like this to be within your system environment since you don’t want to expose your production DB credentials within your source code. You can export this within your terminal running the following command in your bash.
export JDBC_DATABASE_URL="jdbc:postgresql://localhost:5432/postgres"
Or you can pass this environment variable when running the project from the command line:
./gradlew run -PJDBC_DATABASE_URL="jdbc:postgresql://localhost:5432/postgres"
Connect to Database
To get a database running with Ktor, the libraries used for this project are:
- PostgreSQL JDBC Driver - enables connecting a Java program to a PostgreSQL database
- Exposed - object-relational mapping (ORM) to abstract away working with raw SQL statements
- Hikari - high-performance and lightweight JDBC connection pool
Add the dependencies to the build.gradle.kts.
val exposeVersion = "0.50.1"
implementation("org.jetbrains.exposed:exposed-core:$exposedVersion")
implementation("org.jetbrains.exposed:exposed-dao:$exposedVersion")
implementation("org.jetbrains.exposed:exposed-jdbc:$exposedVersion")
implementation("org.postgresql:postgresql:42.7.2")
implementation("com.zaxxer:HikariCP:5.1.0")
Then create an interface to allow us to query the database, this will help abstract away the database implementation detail from the rest of the app which will help with testing later.
package com.plusmobileapps.data

interface Database {
    suspend fun <T> dbQuery(block: () -> T): T
}
Now create the implementation of the Database by injecting the IO dispatcher so queries will not block the main thread and the environment variable for the JDBC url declared earlier.
class DatabaseImpl(
    private val ioContext: CoroutineContext = Dispatchers.IO,
    private val jdbcUrl: String = System.getenv("JDBC_DATABASE_URL"),
) : com.plusmobileapps.data.Database {

    init {
        val datasource = hikariDataSource()
        // Connect Exposed to the database
        Database.connect(datasource)
    }

    // Move all db queries to io thread and wrap within a DB transaction
    override suspend fun <T> dbQuery(block: () -> T): T = withContext(ioContext) {
        transaction { block() }
    }

    // Create datasource with Hikari passing in the JDBC url
    private fun hikariDataSource(): HikariDataSource = HikariDataSource(
        HikariConfig().apply {
            driverClassName = "org.postgresql.Driver"
            jdbcUrl = this@DatabaseImpl.jdbcUrl
            maximumPoolSize = 3
            isAutoCommit = true
            transactionIsolation = "TRANSACTION_REPEATABLE_READ"
            validate()
        }
    )
}
Finally create an instance of the database at application start.
fun main() {
    embeddedServer(Netty, port = 8080, host = "0.0.0.0", module = Application::module)
        .start(wait = true)
}

fun Application.module() {
    val database: Database = DatabaseImpl()
    configureRouting(database)
}
Interacting With Database
At this point the database has been initialized and the application should be connected to the database, although we haven’t done anything with the database yet. Lets create a dogs table using Exposed which will have a couple of properties for name and image url.
object Dogs : UUIDTable() {
    val name = varchar("dog_name", 50).index()
    val imageUrl = text("image_url").nullable()
}
We could technically work with the dogs table as is, although Exposed provides a DAO API which makes working with a table even easier.
class Dog(id: EntityID<UUID>) : UUIDEntity(id) {

    companion object : UUIDEntityClass<Dog>(Dogs)

    var name: String by Dogs.name
    var imageUrl: String? by Dogs.imageUrl
}
So now if a create dog or get all dogs endpoint was made, interacting with the database will now have some idiomatic APIs to access or create a new dog in the table. A DogDto is made to be able to respond to any API requests with which will have a convenience function for mapping from a database entity.
@Serializable
data class DogDto(
    val uuid: String,
    val name: String,
    val imageUrl: String?,
) {
    companion object {
        fun fromEntity(dog: Dog): DogDto = DogDto(
            uuid = dog.id.value.toString(),
            name = dog.name,
            imageUrl = dog.imageUrl,
        )
    }
}

fun Route.getDogs(database: Database) {
    get(DOGS_ENDPOINT) {
        val dogs = database.dbQuery {
            Dog.all().toList().map { DogDto.fromEntity(it) }
        }
        call.respond(HttpStatusCode.OK, mapOf("dogs" to dogs))
    }
}

fun Route.addDog(database: Database) {
    post(DOGS_ENDPOINT) {
        try {
            val dog = call.receive<DogDto>()
            val newDog = database.dbQuery {
                Dog.new {
                    name = dog.name
                    imageUrl = dog.imageUrl
                }
            }
            call.respond(HttpStatusCode.OK, DogDto.fromEntity(newDog))
        } catch (e: Exception) {
            println(e.message)
            call.respond(HttpStatusCode.InternalServerError)
        }
    }
}
If you were to run the project at this point though, you will actually see the app crash when the endpoint is called because the dogs table doesn’t exist since it was never created. Exposed provides a convenience method that can create the table for us by calling SchemaUtils.create(Dogs). However the second you need to add columns to this table, it becomes increasingly more difficult to manage database migrations since Exposed doesn’t offer this out of the box. Flyway to the rescue!
Database Migrations
As a project scales and evolves over time, migrating databases is a crucial tool as you can recreate the same database quickly and easily understand the state a database will be in. Flyway is one library that can help manage database migrations which will be used for this tutorial, specifically the Flyway Java API.
First start by adding the dependencies to the build.gradle.kts. Flyway specifically needs the Flyway Postgres driver in the classpath, so that will need to be declared in the buildscript.
val flywayVersion = "10.12.0"

buildscript {
    repositories {
        mavenCentral()
    }
    dependencies {
        classpath("org.flywaydb:flyway-database-postgresql:$flywayVersion")
    }
}

dependencies {
    implementation("org.flywaydb:flyway-core:$flywayVersion")
    implementation("org.flywaydb:flyway-database-postgresql:$flywayVersion")
}
After syncing the project, in the src/main/resources/db/migration folder create a file, V1__Create_dogs_table.sql, for the first version of the database to create the dogs table.
CREATE TABLE Dogs
(
    id        UUID PRIMARY KEY,
    name      VARCHAR(50),
    image_url TEXT
);
Then the Flyway Java API can be used in the DatabaseImpl file to run the migrations before Exposed connects to the database.
class DatabaseImpl() : com.plusmobileapps.data.Database {

    init {
        val datasource = hikariDataSource()
        migrate(datasource)
        Database.connect(datasource)
    }

    private fun migrate(dataSource: DataSource) {
        try {
            val flyway = Flyway.configure()
                .dataSource(dataSource)
                .load()
            flyway.migrate()
        } catch (e: FlywayException) {
            LOGGER.error("Failed to migrate database", e)
        }
    }
}
Now when the app is ran, Flyway will run any migrations if any need to be applied from all the migration files that exist in src/main/resources/db/migration folder. So now when the API endpoints are called to get or create dogs, Exposed won’t complain about the tables not existing since Flyway would have created it from the first version of the DB migration.
The real magic to Flyway comes as you need to make changes to the database, for example adding a new column for dog breed.
object Dogs : UUIDTable() {
    //
    val breed = text("breed").nullable()
}

class Dog(id: EntityID<UUID>) : UUIDEntity(id) {
    //
    var breed: String? by Dogs.breed
}
Then a new migration can be added, V2__Add_breed_to_dogs_table.sql which will alter the dogs table to have a new column.
ALTER TABLE Dogs
    ADD COLUMN breed TEXT;
Without any additional changes, the next time the app is run Flyway will automatically detect the database is on version 1 and migrate the database to version 2 where the dog breed column was added.
Testing
When it comes to testing a Ktor app with a database, one common solution is to use H2 database which is an in memory Java database. This will allow us to write tests without the explicit need for a Postgres database. First add the H2 dependency to the build.gradle.kts, note this is imported using testImplementation since this will not be used in production.
testImplementation("com.h2database:h2:2.2.224")
Making use of the Database interface created earlier, a fake implementation can be made using the H2 database for use in tests.
class TestDatabase(
    private val context: CoroutineContext = UnconfinedTestDispatcher(),
) : Database {

    private val datasource = h2DataSource()
    private val flyway = Flyway.configure()
        .dataSource(datasource)
        .cleanDisabled(false) // allows for clean up after each test.
        .load()

    init {
        flyway.migrate()
        org.jetbrains.exposed.sql.Database.connect(datasource)
    }

    // To be called after each test to wipe the database
    fun close() {
        flyway.clean()
        datasource.close()
    }

    override suspend fun <T> dbQuery(block: () -> T): T = withContext(context) {
        transaction { block() }
    }

    private fun h2DataSource() = HikariDataSource(
        HikariConfig().apply {
            driverClassName = "org.h2.Driver"
            jdbcUrl = "jdbc:h2:mem:test;DB_CLOSE_DELAY=-1"
            maximumPoolSize = 3
            isAutoCommit = true
            transactionIsolation = "TRANSACTION_REPEATABLE_READ"
            validate()
        }
    )
}
Now a test can be created using the test database. To make testing a little simpler I had created a few utility extension functions which will install content negotiation on the server and the client used to call the server.
fun myTestApplication(block: suspend ApplicationTestBuilder.() -> Unit) = testApplication {
    installContentNegotiation()
    block()
}

fun ApplicationTestBuilder.createJsonClient(): HttpClient = createClient {
    install(io.ktor.client.plugins.contentnegotiation.ContentNegotiation) {
        json()
    }
}

fun ApplicationTestBuilder.installContentNegotiation() {
    install(io.ktor.server.plugins.contentnegotiation.ContentNegotiation) {
        json()
    }
}
Finally, a test can be written using the TestDatabase. It’s important to note that before each test a new instance of TestDatabase is created and after each test the database is closed. Without calling close on the TestDatabase, other tests might fail from having stale data from previous tests that were run so its critical to clean up the database in between every test.
class DogRouteTest {

    private lateinit var database: TestDatabase

    @Before
    fun setUp() {
        database = TestDatabase()
    }

    @After
    fun tearDown() {
        database.close()
    }

    @Test
    fun `GET dogs returns list of dogs`() {
        myTestApplication {
            val client = createJsonClient()
            val dogs = database.prepopulateDogs()

            routing {
                dogRoutes(database)
            }
            val response: HttpResponse = client.get(DOGS_ENDPOINT)
            response.status shouldBe HttpStatusCode.OK
            response.body<DogsResponse>() shouldBe DogsResponse(dogs.map { DogDto.fromEntity(it) })
        }
    }
}
Deploying as Jar
Since I use Heroku to actually deploy my projects to production, the project needs to be exported as a jar. I did run into one issue where Flyway couldn’t be run from the jar only, so figured its worth calling out how I managed to get around that. Instead of manually creating a new task that can package up the project into a jar, Ktor actually provides a solution with the plugin to create a fat jar.
First add the Ktor plugin to the project.
plugins {
    id("io.ktor.plugin") version "2.3.11"
}
Ensure the main class is set within the application block.
application {
    mainClass.set("com.plusmobileapps.ApplicationKt")
}
Then in the terminal run the command to build the fat jar.
./gradlew buildFatJar
Finally the app can be run from jar!
java -jar build/libs/ktor-postgres-flyway-all.jar
Conclusion
As this article comes to a close, you should have learned how to setup a Postgres database in a Ktor project and how to manage database migrations with Flyway. Hope this helps someone else and always open to feedback if you want to leave a comment. Happy coding!